Wednesday, August 28, 2019

Paper Piecing Challenge

For the Paper Piecing Challenge, I made a quilt -- a PAPER quilt!


How I made the card:

First I chose a white A2-sized card blank and adhered the blue background which was slightly smaller, creating a white border. Then, I chose my patterned paper and ran it through the die-cutting machine using Spellbinders Quilt It dies. Next, I ran each piece through my Xyron sticker maker. Having the sticky on the back helped me to place the pieces on a white piece of card stock. Once I was finished with the placement, I cut around the "quilt", leaving a small white border. I adhered that piece to the blue background.

Here is the die set that I used:


Sharing with:


WOYWW 534 - What's On You Workdesk Wednesday

(If you don't know what this is all about then please visit the Stamping Ground, our host Julia will explain.)

My desk is full, so full that it has spilled onto the floor on the left and to the guillotine paper cutter table to the right. It's a mess, but I also know where everything is, and it's within reach! Here's the proof:
 

Bottom left: cards that have been made, recent ATCs, blue masking tape (that I just realized my cat has been into), and a package of T!m Holtz's paper dolls (I think they're called). Midway: label maker for the ATCs and the entire collection of Distress Inks. At the back: brushes, gesso and a collection of paper word strips.


Bottom left: the proverbial 12" square of working space. To the right: clutter of experiments, things that don't need to be on my desk, and on top is a tag I am working on. Middle back: the double-stick tape cozy (because said cat likes to chew on tape) and a variety of controls for the TV and DVD player. In the middle foreground: my massive quantity of scraps, which is on the floor, and the guillotine paper cutter on a small TV tray table.


This is what spilled onto the floor. From the left are watercolor tools, Vivid ink pads, a box of fairly new stuff, a pencil case that holds acrylic blocks and the waste basket. As a bonus, there are wet paper towels that are drying. Another cat enjoys ripping the paper towels (and toilet paper) apart. 

Sharing with:


Monday, August 26, 2019

School Days: An ATC for my Swap Group


How I made my Artist Trading Card:

I cut a sturdy background 2.5" by 3.5" and adhered Primary-grade paper to the front. I stamped a ruler (100 Proof Press) and cut it down length- and width-wise and adhered it to the right of the card. Next, I stamped the numbers (Ma Vinci - ?) in Distress Ink Festive Berries and the clock (inkadinkado - Dawn Houser) in Versafine Ink Onyx on the left.  The ball is an old sticker I had in my stash. Then, I scanned the spines of early readers and the front of one and glued them into place. I threaded a pencil charm onto thin red-and-white-polka-dot ribbon and tied it into place through a hole I punched with my Silent Setter. I had to glue the knot in place, too.

Sharing with:

Simon Says Stamp Blog Monday Challenge S is for ...

Friday, August 23, 2019

Poetic Daisies


How I made this:

The base of this card is an A2-sized kraft card blank. The next layer is a golden-colored card stock, and I stamped it with Hero Arts Italian Poetry Background with Distress Ink Brushed Corduroy. The No. 8, stamped in Vintage Photo, comes from Ma Vinci's, I believe. Then, I layered a piece of burlap paper. On top of that, I adhered 2 daisies and  leaf stem from Tim Holtz dies. I colored the leaves with Mowed Lawn and the daisies with Antique Linen and Scattered Straw.

I'm sharing this with:

The Artistic Stamper Creative Team Blog

Country View Challenges 

Try it on Tuesday 

Internation Art & Soul 

It's a Bug's Life 2


How I made this card:

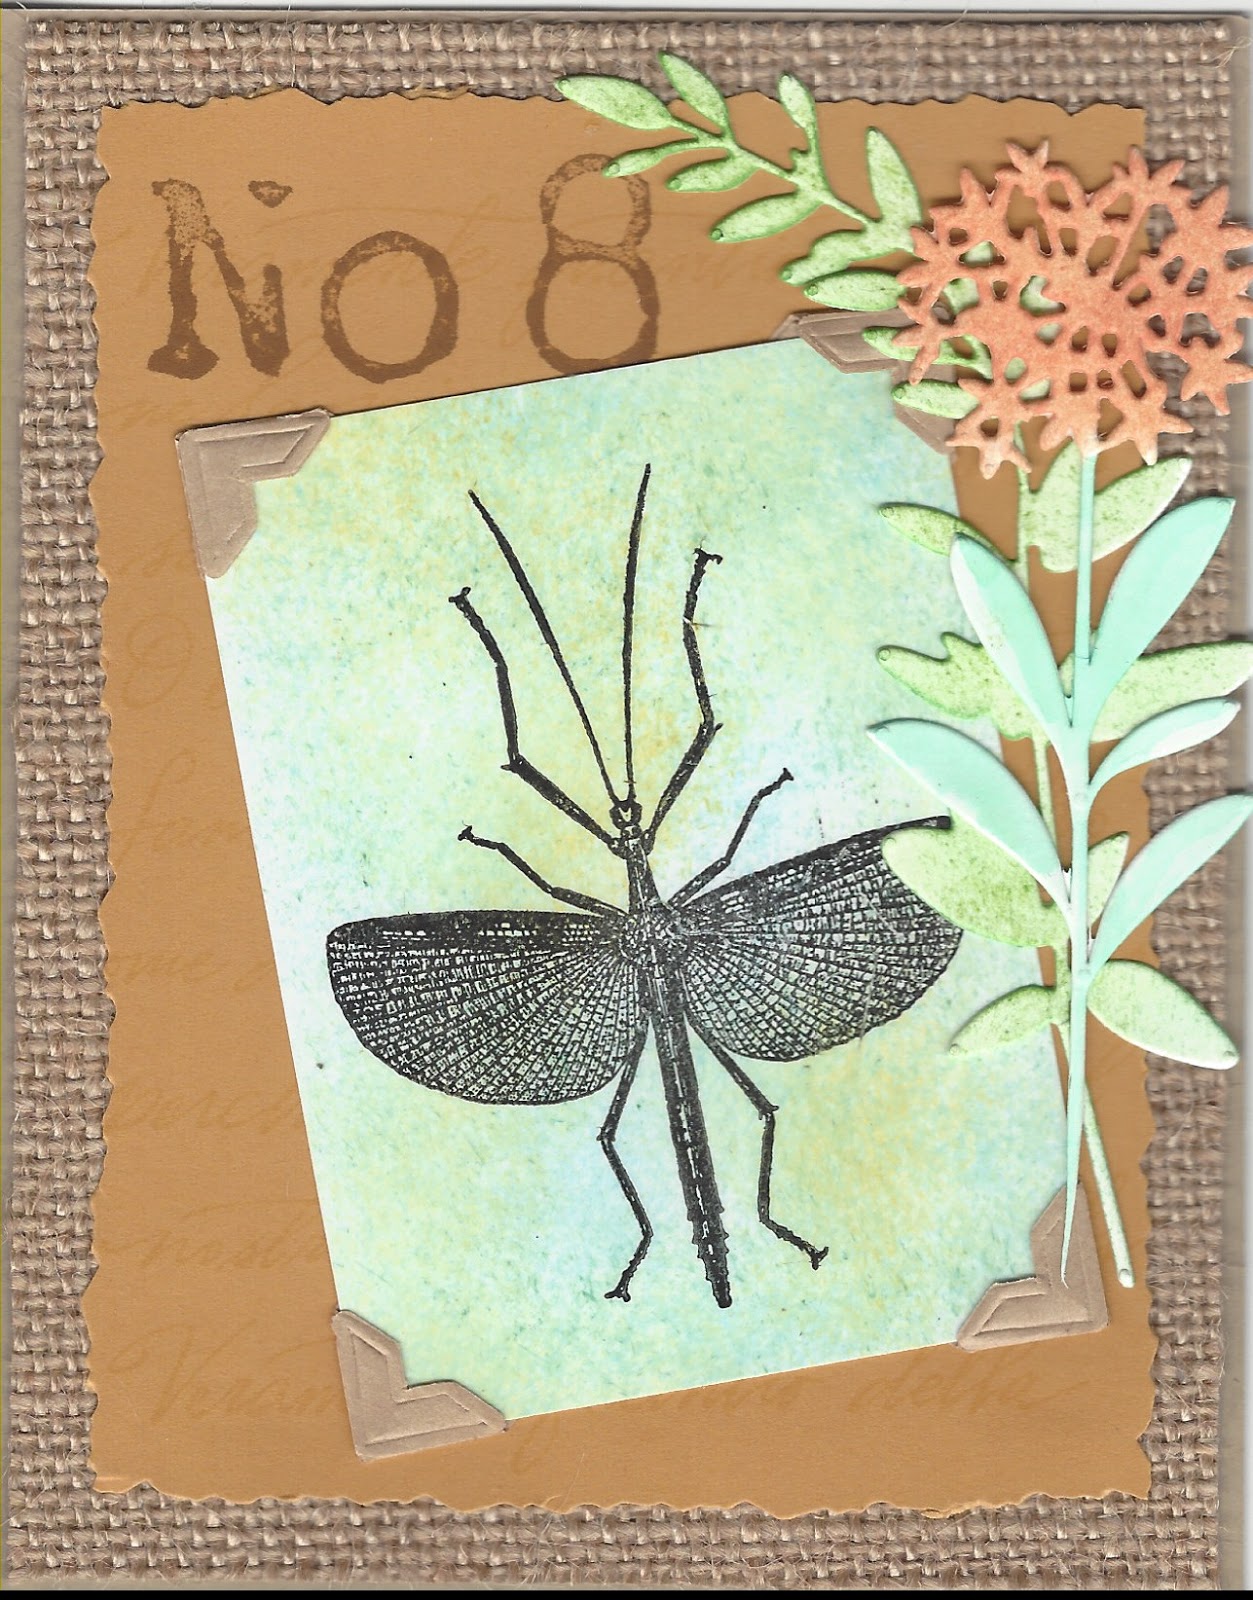
I started with an A2-sized kraft card blank. On top of that, I adhered a piece of burlap paper. Then I stamped Hero Arts Italian Poetry Background on the golden yellow card stock with Scattered Straw and adhered it to the burlap paper. (I think the No. 8, stamped in Vintage Photo, came from Ma Vinci's.) Next, I pounced Distress Inks Tumbled Glass, Evergreen Bough and Scattered Straw onto photo paper with stencil brushes and stamped the winged bug (100 Proof Press). I attached that to the front of the card and added photo corners. After that, I die cut Tim Holtz flower stems. I colored the leaves with Lucky Clover and Mowed Lawn and the flower with Dried Marigold using a water brush. Then, I adhered those to the card.

Where I'm sharing:

Crafty Cardmakers

Stamping Sensations

The Artistic Stamper Creative Blog

Cardz 4 Galz 

Try it on Tuesday 

International Art & Soul 

It's a Bug's Life 1


How I made this card:

I stamped the dragonflies (unmounted, from Stamp Camp) image on erasable typing paper I had on hand. I didn't like how the stamping looked, so I turned it over. I like the frosted look, so I decided to use the image this way. I cut the edge with deckle scissors and adhered it to a red rectangular piece of card stock. Then, I adhered it to an A2-sized black card blank. After that, I stamped All Night Media's Chinese Love in Versamark embossing ink and embossed it in gold.

I am sharing it here:


Tuesday, August 20, 2019

Another recent Artist's Trading Card

Here is another ATC I made for our swap. I mailed them out on Saturday. At the beginning of next month, I will get three from the other women who are part of the swap.


This one combines my love of sewing with my love of paper crafts.

To make this, I photo copied the front of a Vogue pattern I have. I resized it and printed it on white card stock. I cut around the figure with my craft knife, leaving "Vogue Pattern" attached. I glued that to my heavy ATC card blank. I used short applique straight pins I have and ran it through the fabric swatches so they appeared to be a part of a fashion idea board. Then, I glued a button and the two swatches of fabric to the right side of the card.

I'm also sharing this ATC with Simon Says Stamp Blog Monday Challenge. 

You can see the contest here:  https://www.simonsaysstampblog.com/mondaychallenge/

A recent Artist Trading Card

Here is an ATC I made recently. ATCs measure 2.5" by 3.5", so when I gave her wings, I needed to make sure they fit inside the card. When closed, she peeks out; when open, she flies.


How I made this: I found both images on The Graphic Fairy's site. I printed the little girl and the butterfly onto white card stock. I cut the little girl image down to 2.5" by 3.5" and glued her to my ATC blank. Then, I used white gesso and the tip of my paint brush to color in the flowers in her hair and on her corsage. I fussy cut the butterfly wings, eliminating the body. I punctured two holes into the card with the hole maker from my Silent Setter, and using paper fasteners, I pinned each wing to the little girl's shoulders. I made sure they could move easily into open mode, then I closed them for mailing.

I am submitting this to Simon Says Stamp's Monday challenge, and since it's my birthday, I have to win. Simple! lol  

Here's the link: Simon Says Stamp Blog

Friday, August 9, 2019

My Art: Two Artist's Trading Cards

I belong to a group of Artist's Trading Card, or ATC, enthusiasts who trade cards once a month. The first one was for Summer Memories, and the second is Mermaid Lagoon for June and July, respectively:


Artist's Trading Cards measure 2.5" by 3.5", and they are traded, never sold.

Thursday, July 25, 2019

My Art: A series of four cards using Spellbinders Dies

My card box is full, so I have been trying my hand at some more time-consuming cards, like using several of my many dies.

This first one involved copying the card that came as an example on the package:


It was easy enough to recreate, so I decided to use the other fruit and vegetable die sets:


It was a lot of fun to stretch my creative muscles to make these cards that required a little more effort and thought.